CM2040 Databases Networks and the Web
Smart Hub for Smart Devices
The Brief
The Smart Home Hub served as the midterm project for CM2040 Databases Networks and the Web. It was also an example of full stack development. The purpose of this project was to build a dynamic web application that included:
- Database access.
- Procedurally generated webpages.
- Allowed user to visualise, edit, and interact with the data in the database.
The form the project took, was a dashboard. This dashboard was used for networking and controlling a users Internet of Things (IoT) devices, also known as smart home devices. The project focused on building the different layers required such as, the database SCHEMA or design, the server, and the interactive dashboard. This put the real-time control of IoT devices outside the scope of the project.
The experience
The general experience of this application is similar to browsing a webpage. Users access the application through a internet browser of their choice, by entering the address of the host server. This takes the user to the applications homepage. From here the user can interact with the application, by clicking buttons to move between pages, and filling out form fields to update stored data.
As the simulation focused on building the different layers in a full stack development, there is currently no way to network a real IoT device to the system. Furthermore, there is also no user accounts which would be required to personalise and protect an individuals smart devices.
Building Blocks
The challenges of producing a full stack development application was trully interesting and unique. This type of development required considering engineering questions suchs as:
- Front End
- How to build responsive layouts?
- How to display the information?
- How to structure and keep the pages user friendly?
- Backend
- How to handel API requests for storing/retrieving data?
- How to route pages?
- Database
- How to structure the data efficiently?
- How to validate entered data and database security?
- How to handel multiple users?
Some basic requirements of the application such as, the language, database, framework, server environment, and templating system used, were dictated by the project outline. This simplified the design process somewhat, by eliminating thoes questions from the design process. That being said, many of the fundamental decision shuch as database structure remained. From the project outline, Node.js and Express was used to build a simple web server, while EJS templates was used to dynamically build the webpages with data from the MySQL relational database which was used to manage the data. This resulted in the basic local server setup as seen here.
		const express = require("express");
		const bodyParser = require("body-parser");
		const mysql = require('mysql');

		const app = express();
		const port = 8089;
		const db = mysql.createConnection({
			host: 'localhost',
			user: 'root',//your MySQL username
			password: '',//your MySQL password
			database: 'devices'
		});

		db.connect((err) => {
			if (err) {
				throw err;
			}
			console.log("Connected to database");
		});
		global.db = db;

		//handles http POST requests
		app.use(bodyParser.urlencoded({ extended: true }));
		//serves the css style sheet with page requests
		app.use(express.static(__dirname + '/public'));

		//includes all middleware code for handeling querys and page requests
		require("./routes/main")(app);


		app.set("views", __dirname + "/views");
		app.set("view engin", "ejs");
		app.engine("html", require("ejs").renderFile);
		app.listen(port, () => console.log(`Mid Term app listening on port ${port}!`));
Initial development work began by designing and building the basic layout and structure of the database to be used. By considering the project requirements of the application such as, a dashboard for controlling smart home devices, and the required pages to be developed:
- Home Page
- About Page
- Add Device Page
- Show Device Status Page
- Update Device Status Page
- Delete Device Page
It was possiable to determine that a three table database would serve the imediate scope of the project. The resulting structure and layout of the database developed, also known as a SCHEMA, was as follows:
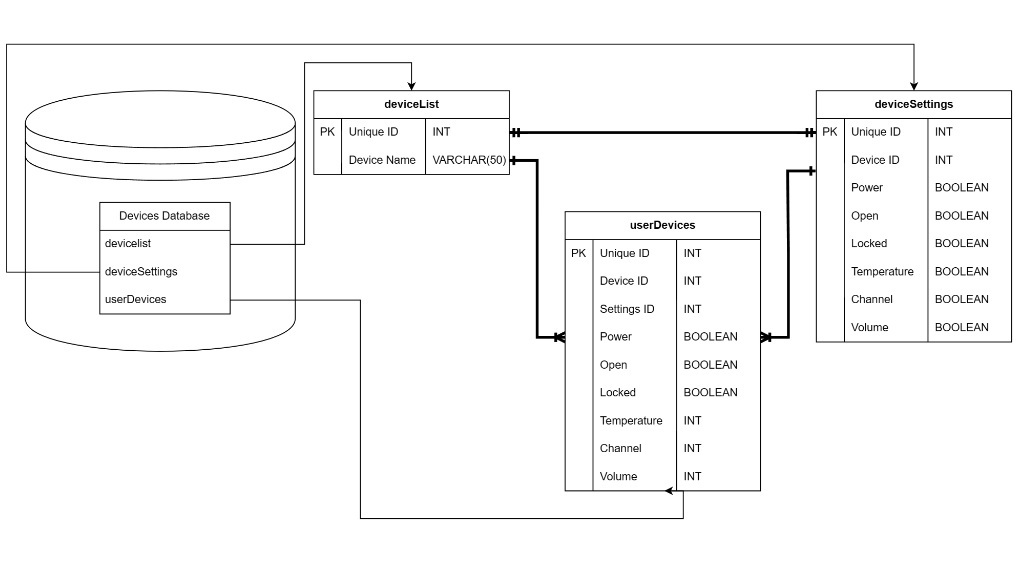
After establishing the design of the required database and building a MySQL representation. Design of the four main application pages began. These pages were:
- Home Page
- About Page
- Add Device Page
- Show Device Status Page
The first two pages were required to include basic application information and navigation links to the other pages. As such,
these pages were fairly simple to design. However, the Add Device Page required considering how to access and
update information held within the database. By including a MySQL query SELECT * FROM deviceList in the middleware
code that executed on page load, it was possible to dynamically load the available options for adding a new device. This data was
then used to populate available options on the page by the EJS render. A second query
SELECT * FROM deviceList INNER JOIN deviceSettings ON deviceList.id = deviceSettings.deviceID was sent when the user
selected a device to add. The returned data built a new page that displayed associated available device settings. However, this
was still only accessing data from the database to be displayed. In order to update the database, a POST request was required.
The POST request sent the newly created device record along with this SQL query which told the database to store the new information
in the user devices table.
INSERT INTO userDevices (deviceID, settingID, power, open, locked, volume, temperature, channel) VALUES (?,?,?,?,?,?,?,?)The same process was used to also dynamically build the Show Device Status Page as well as updating and deleting devices.
Tech Stack
- Node.js
-
Node.js is a cross-platform, open-source server environment designed to work on most common operating systems.
- Express.js
-
Express.js is a minimalist JavaScript framework developed to facilitate building RESTful API's with Node.js.
- EJS
-
EJS is a templating system. HTML pages developed with EJS syntax dynamicly fill data on demand without requireing special JavaScript functions or code.
- MySQL
-
MySql is a relational database management system, using a structured query language.
- HTML 5
-
HTML 5 is the standard markup language for documents designed to be displayed in a web browser.
- CSS 3
-
Style sheet language for describing the presentation of documents written in HTML.
- JavaScript
-
Core programming language used in desiging this application.
Navigating the experience
When a user first navigates to the application, they are greeted by the following home page.
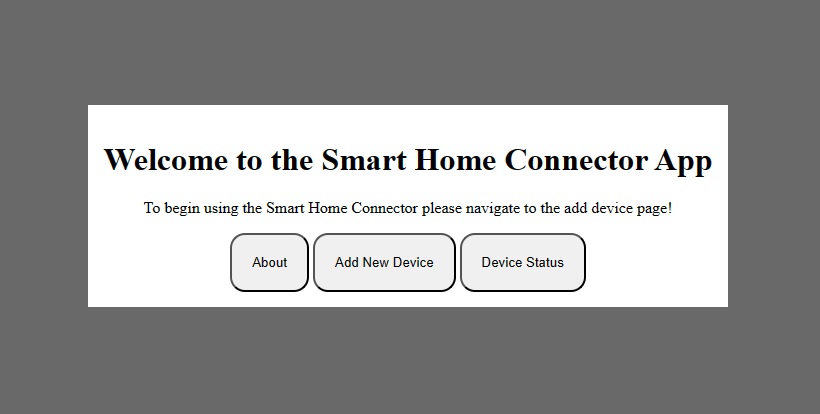
The home pages includes a basic greeting to welcome the user; it also includes a statement indicating that new users first action should be to click on the "add new device" button. If the user does this, the application transitions to the add device page, populating the list of available devices from the database procedurally.
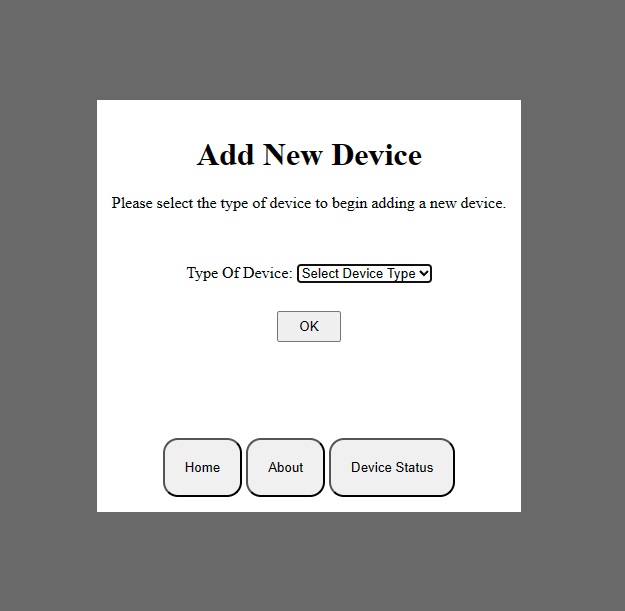
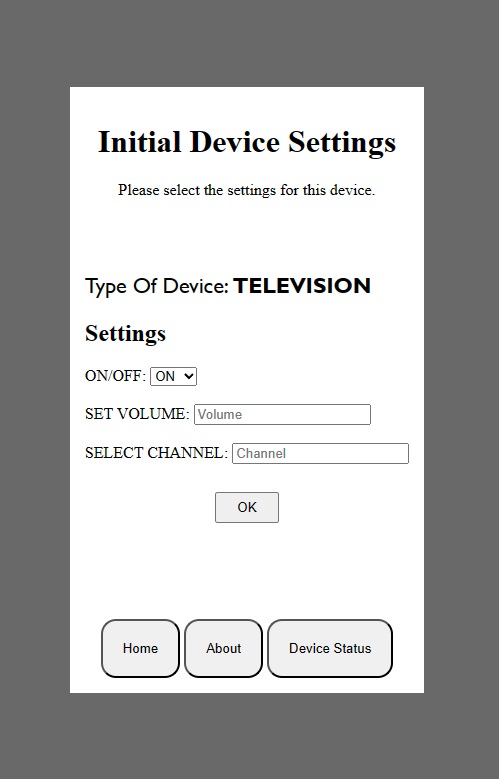
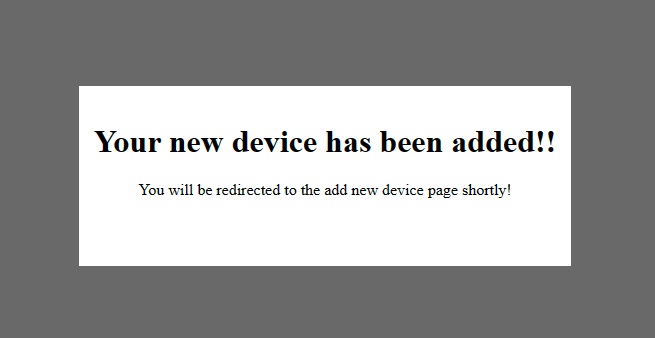
This page allows the user to select a device to add from a list of twenty available devices. If the user clicks ok without selecting a device, an alert is shown indicating that they have not yet selected anything. Once the user has selected a device and pressed ok, a new page is shown, allowing the user to select the devices initial settings. Upon submission, a message indicating the device has been successfully added is displayed and the user is redirected back to the initial add device page.
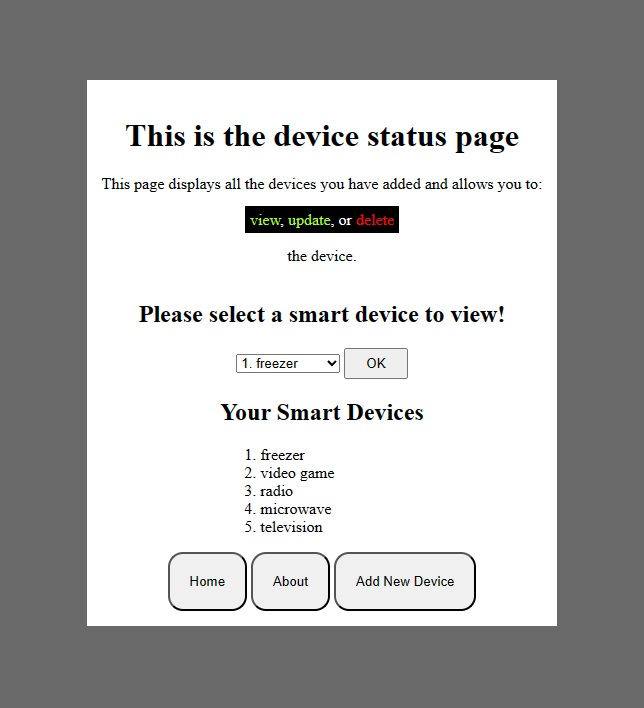
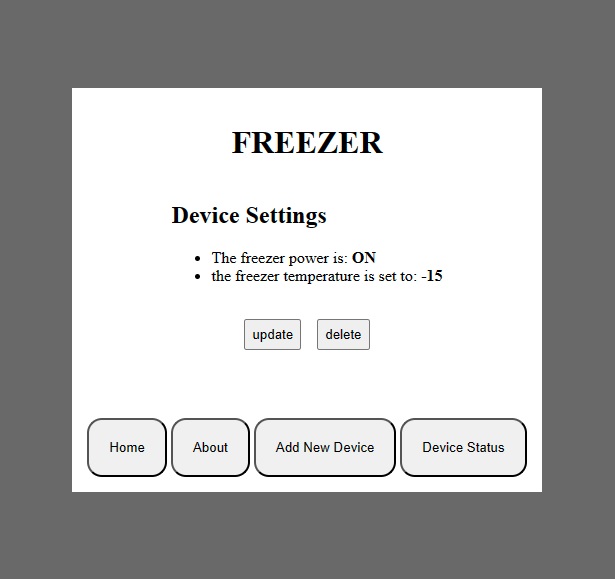
From here if the user is done adding new devices, they have the ability to view the devices already added by clicking The "device status button". This takes them to a page that lists all user devices and allows viewing/editing current settings.
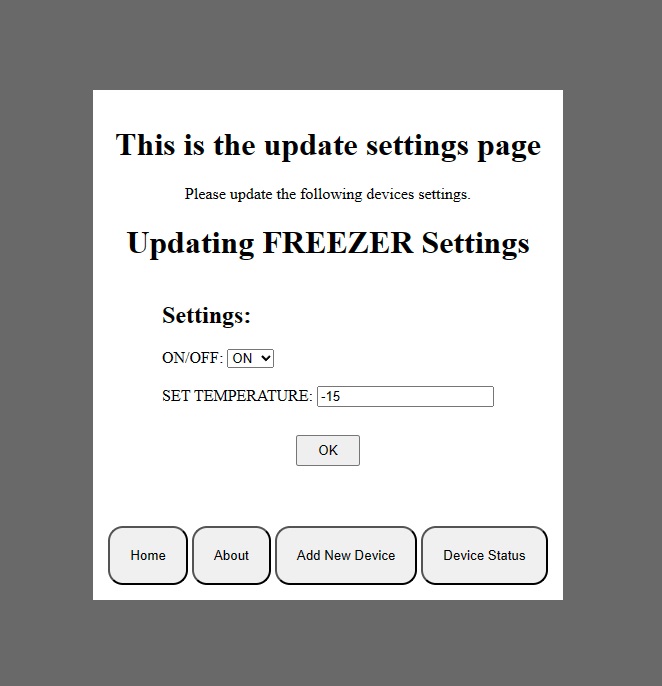
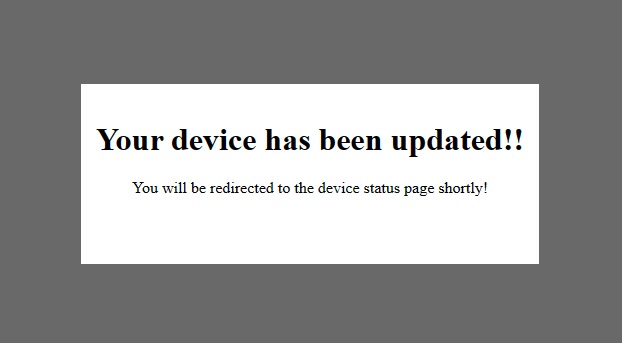
If the user chooses to update a device, the following two pages will be shown upon compleating the action.
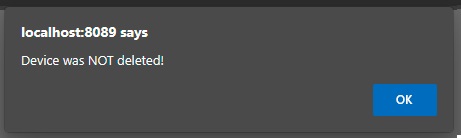
If the user chooses to delete a device, the user is alerted to the fact that deleting cannot be undone.
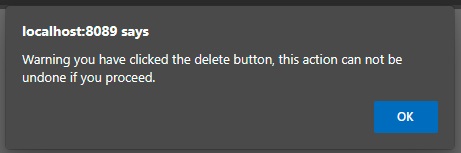
After the user has selected ok, they are presented with the choice to cancel the action, or to continue. If they select to cancel, a message indicating the device still exists is shown. Alternatively, if they choose to proceed, a new message indicating the device was successfully removed is shown, and the user is redirected back to the device status page.

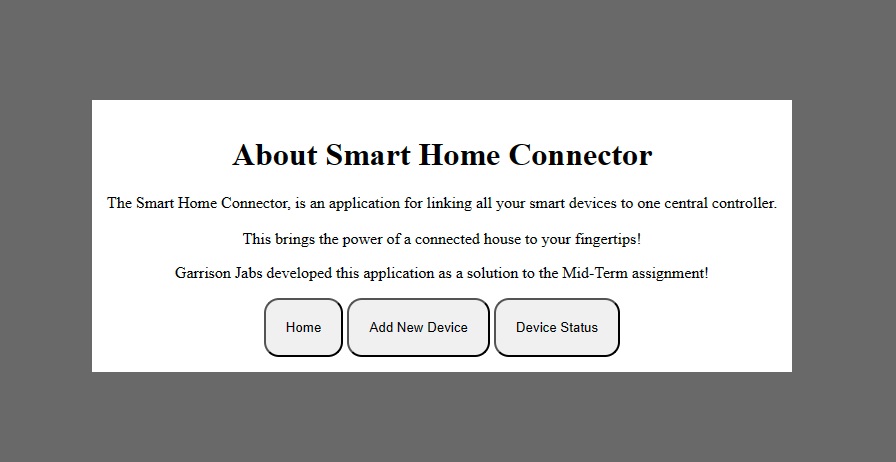
The last page available to the user is the about page. This page displays the purpose of the application and introduces the designer.
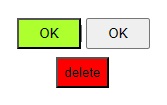
The actions used to allow the user to navigate the experience were: button clicks, drop down menus, and form fields. Some graphical feedback was also used to indicate the difference between a safe action, and a destructive action. For example, as seen in the following image, buttons would higlight green if the action was safe and red if it was not.
Navigation of the experience was kept fairly simple and stuck with actions that most users have previous experience using. This allowed for the fastest learning curve with new users.
Conclusion
Building a full stack application created some interesting challenges that needed to be considered seporatly as well as a part of a complete design. That being said, by utilizing tools developed to stream line the process such as, the EJS templating system for building dynamic webpages, and the express.js framework for building a server, made solving these challenges relitivly easy. While this application served as great example of a simple full stack development, it did lack some serious considerations for an application of this nature suchs as:
- Form field validation to protect against SQL injection attacks.
- Dealing with multiple user accounts and user authorization validation.